
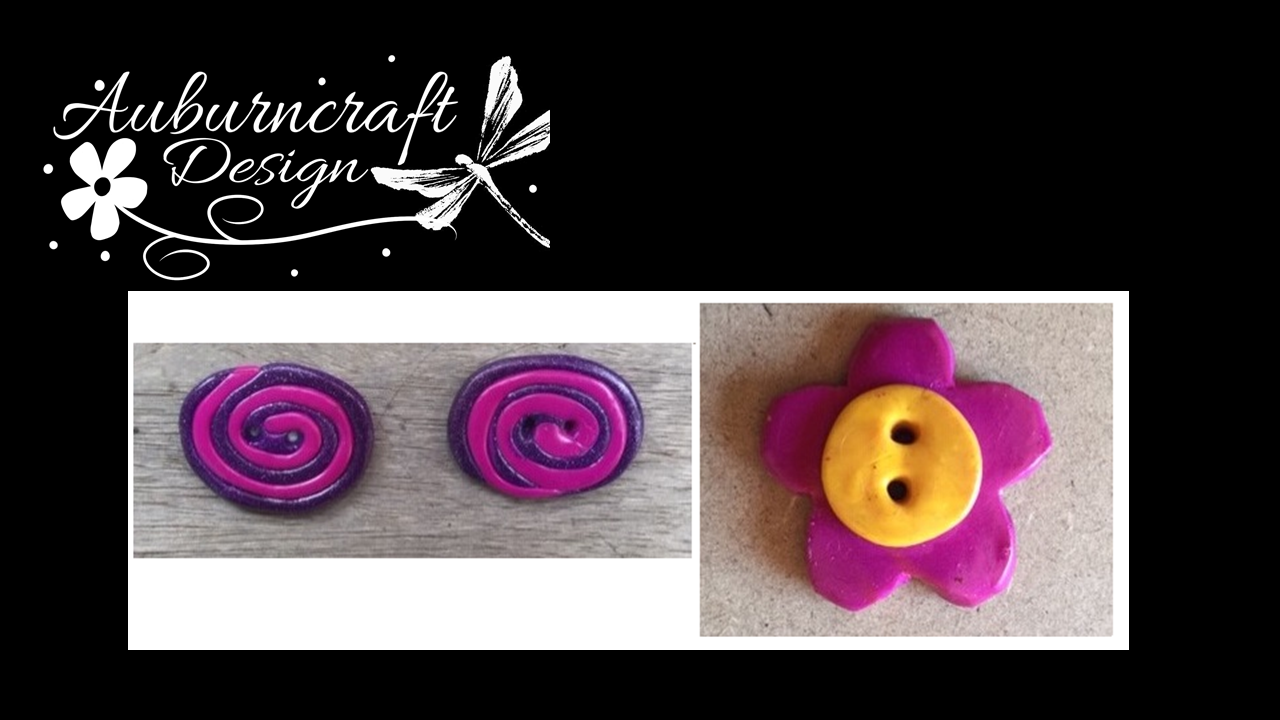
Below I outline how to make the spiral buttons and the flower button.
I first decided to make my own buttons for a freeform Coat I made. I named this my ‘Technicolour Yawn’ coat due to all the amazing colours in it. Once the Coat was completed my mind turned to buttons

I first decided to make my own buttons for a freeform Coat I made. I named this my ‘Technicolour Yawn’ coat due to all the amazing colours in it. Once the Coat was completed my mind turned to buttons
I needed unique buttons for this unique coat. They needed be a statement of epic proportions! Something that reflects the hours of frustration this that went into the making of the coat. I have looked high and low for these gems but with no success. Nothing yelled 'these are the ones' at me. I had to find something that I felt was unique enough to do justice to this piece of freeform.
Then I had a light bulb moment and so I set about creatinng my own buttons using polymer clay. I want to share this easy way of making your own unique buttons with you:
Spiral Button:
Materials:
Polymer clay in two colours (available at most craft outlets).
A rolling pin
A wooden kebab skewer (or a darning needle will do)
Acrylic gloss varnish
Paint brush
Knife

Step 1:
Roll your clay out into two thin sausages, no more than 5mm thick.
Step 2:
Put the two pieces together with one length slightly longer to begin the curving. Slowly roll your pieces together. When you are at the size of button you require, cut the clay on an angle.

Step 3:
Gently rub at the ends you cut to work them into the rounded shape you need. Squash the button flat and gently rub to make certain the pieces grab together. I wanted an oval shape so I squashed my circle a little.
Step 4:
Using your wooden kebab skewer or darning needle, push holes into the top of the button. If making more than one button, place the first button with holes on top of any following buttons to find exact placement.
Step 5:
Place your buttons on an oven tray and cover with foil. Bake in a slow oven for approximately 15 minutes. Allow to cool.
Step 6:

Paint with Acrylic Gloss varnish making sure to brush out an bubbles. Allow to dry.


Flower Button
I made little button is for a Tote bag 'Field of Flowers'.
Like many of my other projects it is a unique bag and the name says it all. I wanted a button that would reflex that. I decided to make a flower this time!
I have mentioned before that I don't have a huge array of tools for specific things. I tend to use what I have at hand. You will see what I mean below with my use of an old lipstick lid.
Materials:

Polymer clay in two colours (available at most craft outlets).
A rolling pin
A wooden kebab skewer (or a darning needle will do)
Small round object to make petal shapes (I used an old lipstick lid).
Acrylic gloss varnish
Paint brush
Knife
Step 1: With colour 1 of your polymer clay, roll a piece into the a ball about the size of a walnut.
Step 2: Flatten the ball with your rolling pin.
Step 3: Using your lipstick lid, mark the petals by pressing this into the clay.
Step 4: With a sharp knife, gently cut away between the petals.

Step 5: Smooth the edges with your finger.
Step 6: With colour 2 of your polymer clay, roll a piece smaller than your first colour into a ball.
Step 7: Flatten the ball with your rolling pin. Using your lipstick lid, cut a neat circle. Smooth the edges up with your finger.
Step 8: Place the colour 2 circle on top of your flower.
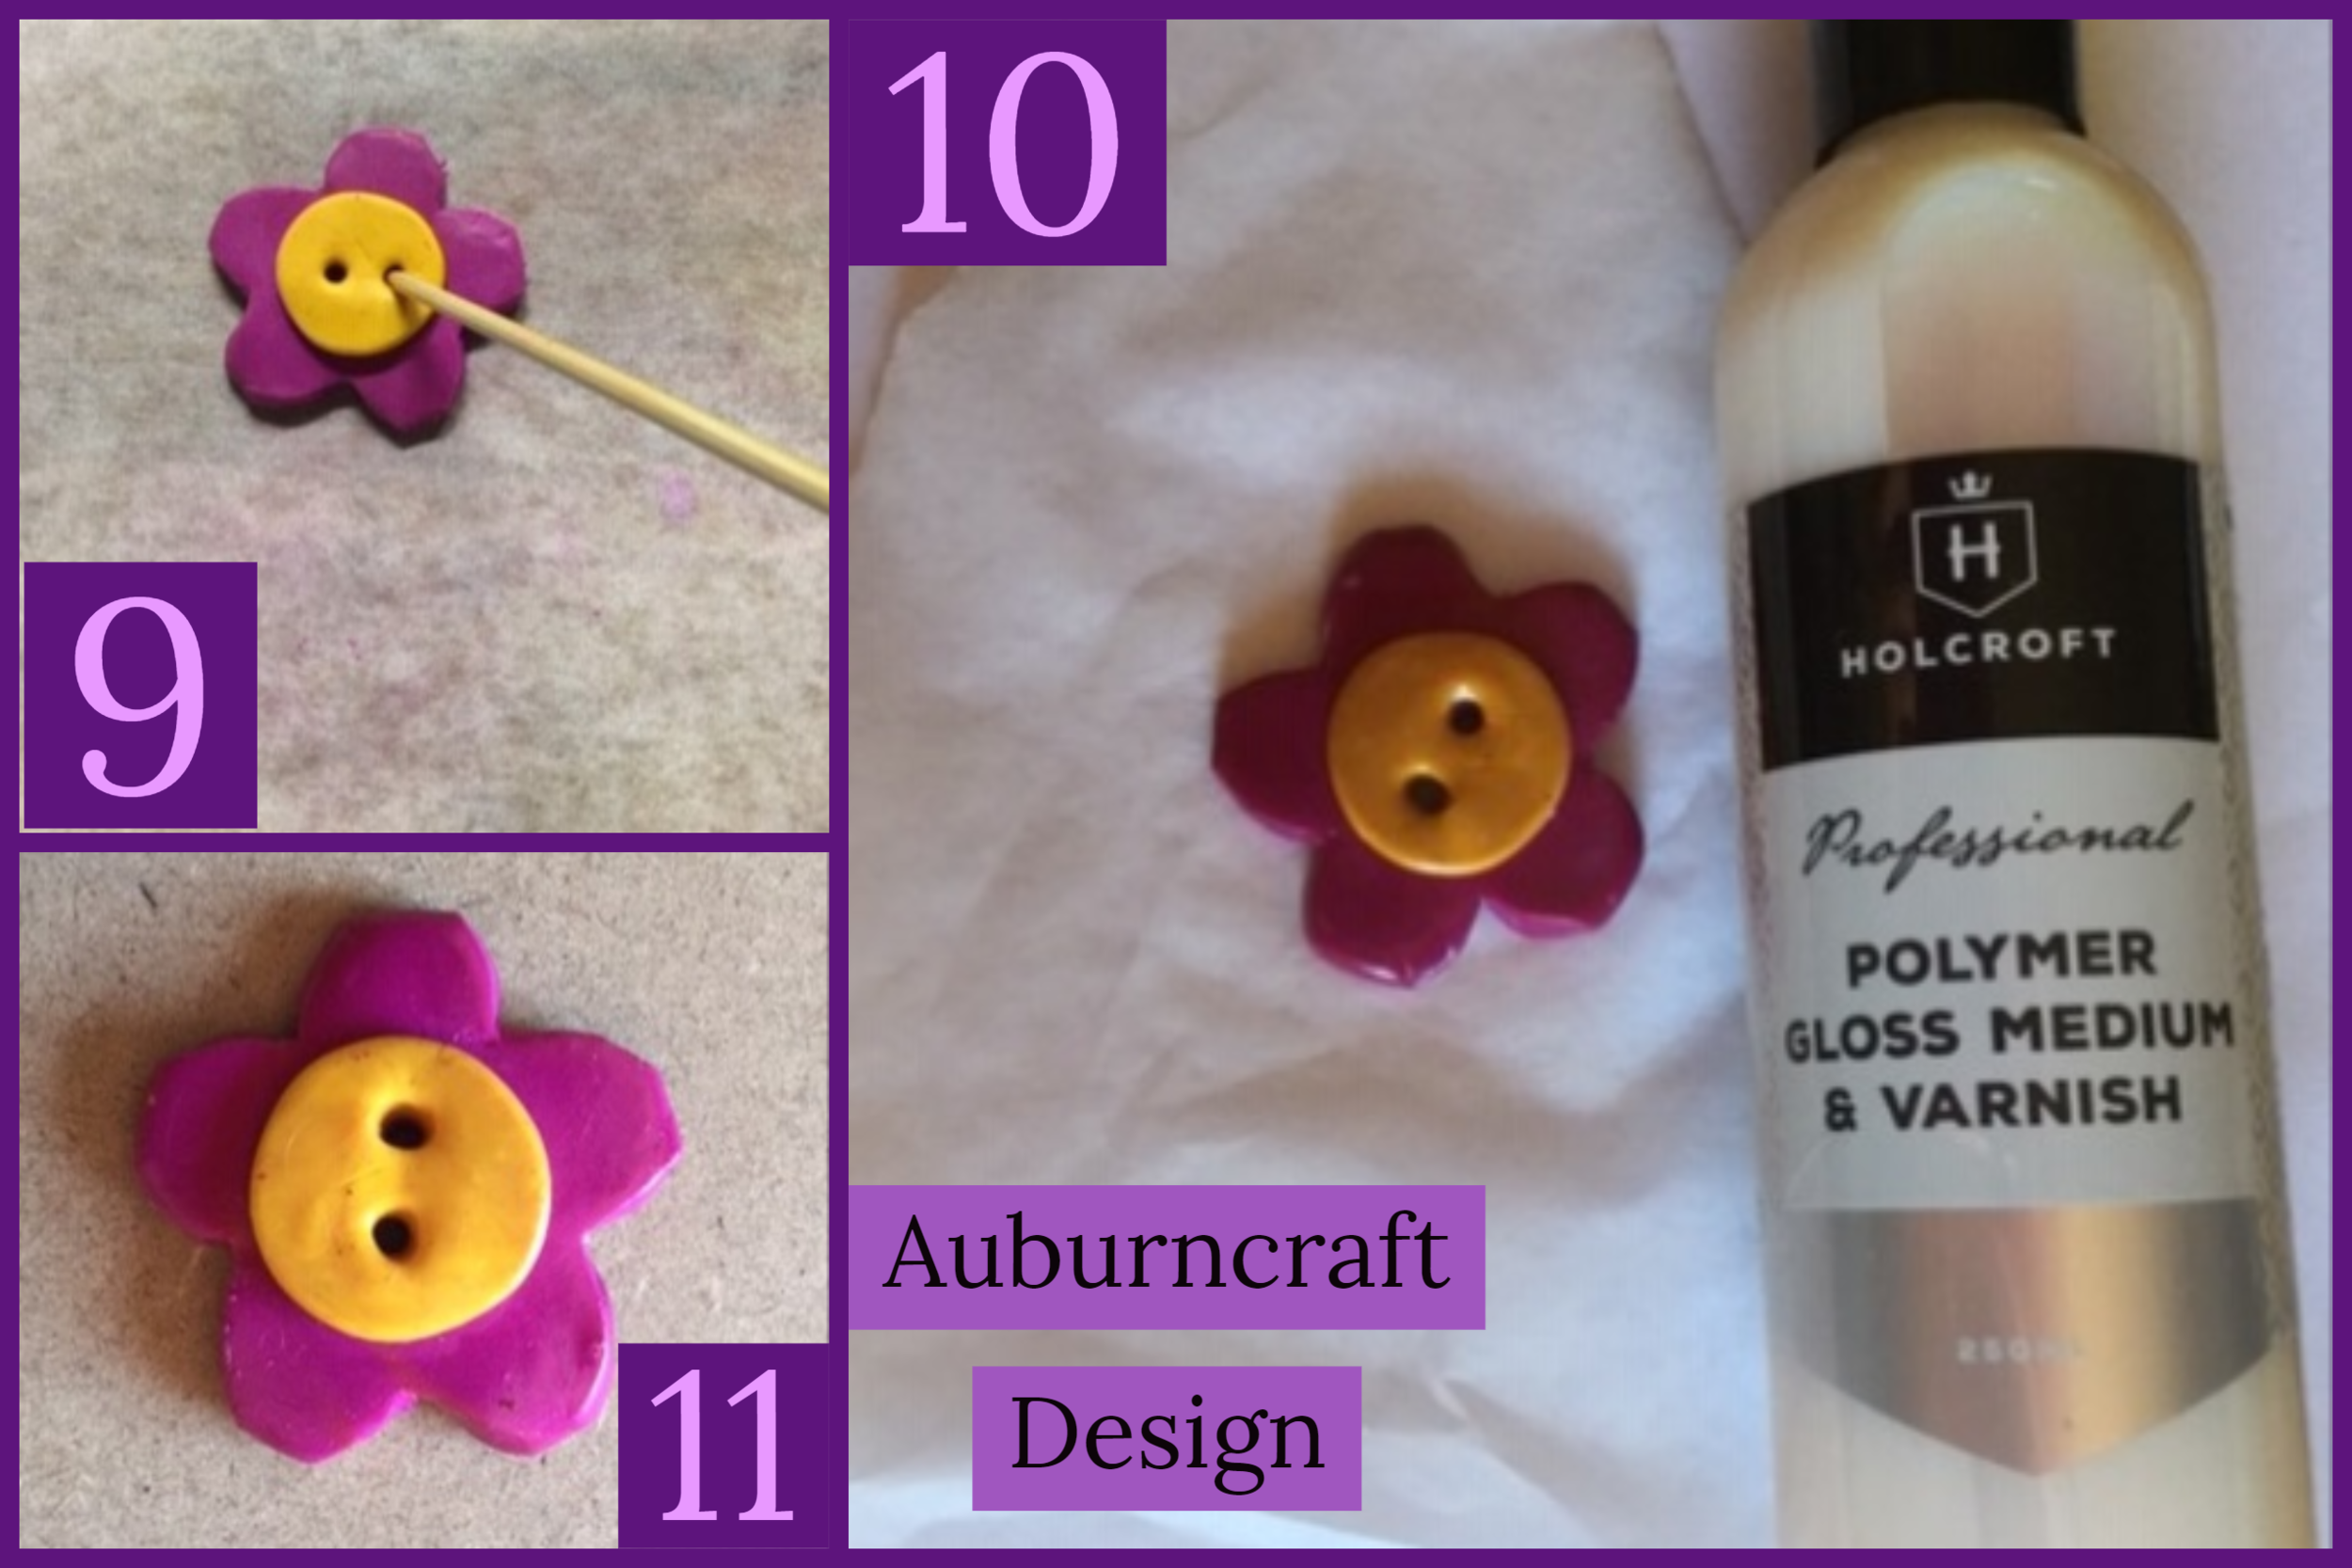
Step 9: Using your wooden kebab skewer or darning needle, push holes into the top of the button. If making more than one button, place the first button with holes on top of any following buttons to find exact placement.
Step 10: Place your buttons on an oven tray and cover with foil. Bake in a slow oven for approximately 15 minutes. Allow to cool.
Step 11: Paint with Acrylic Gloss varnish making sure to brush out an bubbles. Allow to dry.
My Flower button measures approx 50mm
If you love this ‘How To’ please buy me a cup of tea. The link is on this page.